We’ve all been there: it’s 6:30 PM, the fridge is looking hauntingly empty, and the only thing standing between you and a $30 DoorDash fee is a solitary, dusty can sitting in the back of your pantry. For most of us, canned beans are the “break glass in case of emergency” food—functional, a bit boring, and occasionally smelling a little too much like the tin they came in.
But here is the truth: professional chefs rely on canned beans. They are the ultimate culinary shortcut, providing that creamy, melt-in-your-mouth texture that usually takes three hours of soaking and a lot of stove-watching to achieve. The difference between a “sad” bowl of mush and a restaurant-quality dinner isn’t about your cooking skills; it’s about knowing which brands are worth the extra dollar and how to strip away that “industrial” aftertaste before the beans hit your plate.
What Most Grocery Guides Get Wrong
Most generic food blogs tell you to “just dump the can in a pot and heat.” As a strategist who spends 40 hours a week looking at grocery supply chains, I can tell you that’s the fastest way to hate your dinner.
- The “Liquid Gold” Lie: Many guides suggest keeping the canning liquid for flavor. Unless you are making a specific thick stew, that liquid contains the highest concentration of metallic preservatives and excess sodium. Rinse it off.
- The Seasoning Delay: People wait until the end to season. Because canned beans are already cooked, they have a “skin barrier.” If you don’t sauté them with aromatics, the flavor stays on the outside and never reaches the creamy center.
- Ignoring the Firming Agents: If your beans feel “crunchy” even after boiling, it’s not your fault. Some brands use calcium chloride to keep beans pretty for the shelf. You need to know which brands prioritize texture over aesthetics.
The Bean Tier List: What to Grab at the Store
Not all beans are created equal. I’ve found that some budget options practically bounce like rubber, while the high-end stuff tastes like it was simmered in a slow cooker all afternoon.
Expert Product Picks for 2026
| Category | My Top Pick | The Real-Life Take |
| Best Overall | Jovial / Eden Foods | The Lowdown: Packed in glass jars or BPA-free cans. They use Kombu seaweed in the soak to aid digestion. You’ll pay about $4, but for a salad, it’s worth it. |
| Best for Budget | Goya / Bush’s | The Lowdown: The 99-cent staples. Incredibly consistent and sturdy. Perfect for heavy chili or stews where you want them to hold their shape. |
| Best for Healthy Option | Whole Foods 365 (No Salt Added) | The Lowdown: Zero sodium added. It’s a blank canvas. Great for managing blood pressure, but you must season them well yourself. |
Decision Guidance:
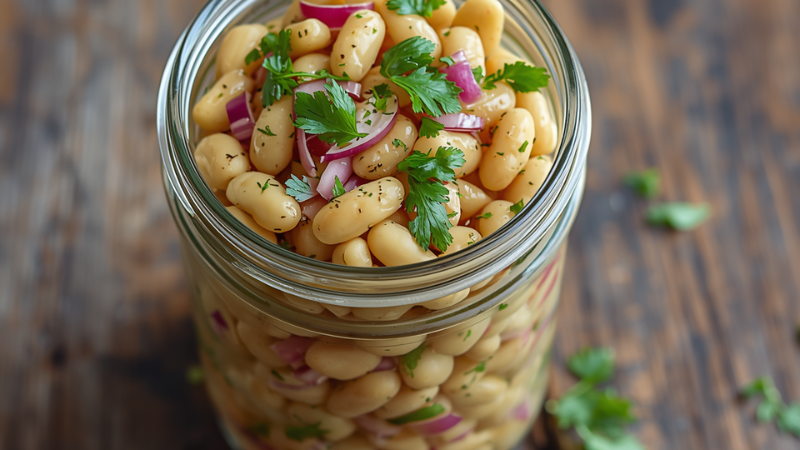
- Choose the Premium Jar (Jovial) if the bean is the “main event”—like a cold bean salad or a toast topper.
- Choose the Budget Can (Goya) if the beans are a “filler”—like in a taco meat mix or a 15-ingredient minestrone.
- Choose No-Salt-Added if you are cooking for toddlers or managing a specific sodium-restricted diet.
The 3-Step Transformation: How to Fix a Cheap Can
If you want your canned beans to taste like they were slow-cooked by an Italian grandmother, you have to break the “dump and heat” habit.
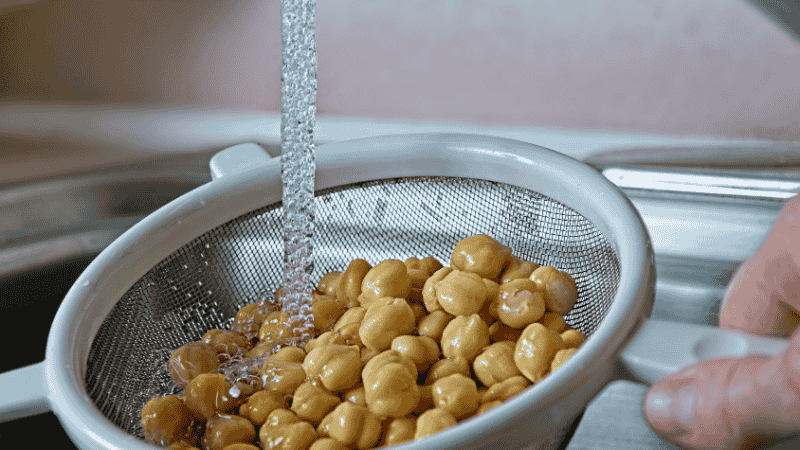
1. The Big Rinse
Unless you’re making a specific stew that needs the thick “aquafaba,” pour them into a colander. Rinse them under cold water until the foam disappears. This doesn’t just cut the sodium by nearly half; it washes away that metallic “canned” flavor.
2. Sauté Your Aromatics
Never put “naked” beans in a pot. Sauté a smashed garlic clove, half a chopped onion, or even a spoonful of tomato paste in olive oil first. This creates a “flavor bridge” that makes the beans taste like a deliberate recipe.
3. The Gentle Simmer
Add your beans to the pan with a splash of chicken broth or water. Simmer for just 5–10 minutes. This allows the beans to soak up the fresh garlic and oil while the heat softens that “crunchy” edge.
Real-Life Scenarios
Case Study 1: The “I have a meeting in 10 minutes” Lunch
The Situation: You’re working from home, you’re starving, and your next Zoom call starts in exactly ten minutes. The Fix: Drain a can of chickpeas. Toss them in a bowl with a squeeze of lemon, a big glug of olive oil, and whatever dried herbs are nearby. Mash about half of them with a fork—this makes it creamy—and pile it onto a piece of toast. It’s a $15 bistro lunch for about $1.20 in materials.
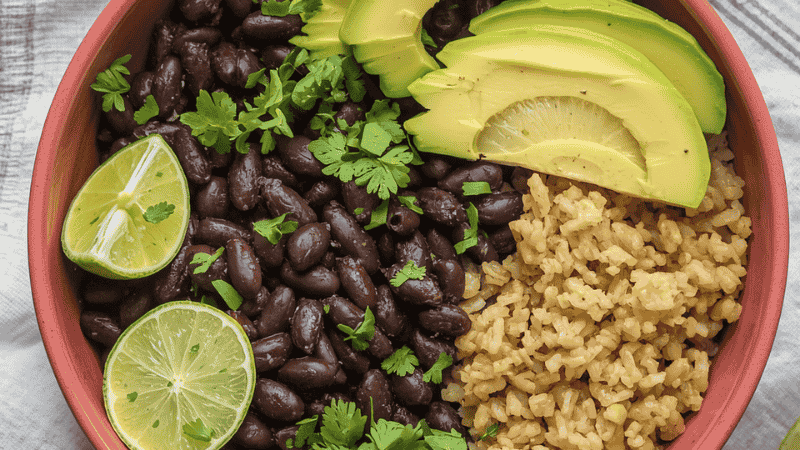
Case Study 2: The “I just hit the gym” Power Bowl
The Situation: You’re exhausted after a workout and need protein, but the thought of thawing frozen chicken makes you want to cry. The Fix: Warm a can of black beans with a teaspoon of cumin and some jarred salsa. Throw it over a bag of 90-second microwave rice and top it with a sliced avocado. You get 15+ grams of protein in the time it takes to take off your gym shoes.
Canned vs. Dried: Is the Convenience Worth the Price?
- The Time Factor: Canned wins, hands down. You’re looking at 5 minutes vs. 12 hours of soaking plus two hours of boiling.
- The Texture: Dried beans stay firmer and have a “snappier” skin. However, I’ve found that premium brands like Jovial are so good that even “bean snobs” can’t tell the difference once they’re sauced.
- The Cost: Dried is cheaper per pound, but for a single person or a couple, the 3x price jump for a $1.50 can is a fair trade for not having to plan your dinner 24 hours in advance.
Mistakes Most People Regret
- The Sodium Trap: Most people forget that a half-cup of canned beans can have 400mg of sodium. If you don’t rinse them, you’ll be chugging water all night.
- The Storage Error: Never store an opened can of beans in the fridge. The metal will leach a “tinny” taste into the beans within hours. Move them to a glass container; they’ll stay fresh for 3–4 days.
- The Early Salt: If your beans feel “tough,” it might be because the brand used Calcium Chloride as a firming agent. Don’t add more salt until the very end, or they’ll never soften up.
FAQ: The Stuff People Actually Ask
Can I eat them straight out of the can? Technically, yes. They are fully cooked during the canning process. I do this with chickpeas all the time for quick salads. Just give them a good rinse first to get the canning liquid off.
Why do they make me so gassy? It’s the complex sugars called oligosaccharides. Thorough rinsing helps, but my secret is simmering them with a pinch of ground ginger or a piece of dried seaweed (Kombu). It helps break down the stuff your stomach struggles with.
What should I look for on the label? Avoid anything with “Added Sugar” unless you’re buying Baked Beans. Also, look for “BPA-Free Lining”—most major brands like Goya and 365 have made the switch, but it’s always worth checking for peace of mind.
How do I make canned beans creamy for dips? If you’re making hummus or bean dip, simmer the canned beans with a 1/2 teaspoon of baking soda for 5 minutes. This breaks down the skins and makes the final result much smoother.
Why do my beans smell like metal? This is common in cheaper brands that use thin tin linings. Rinsing them in a vinegar-and-water solution for 30 seconds can neutralize that metallic scent before you cook them.